Installation
Requirements
- Node.js v20+
- An active Shopify store (learn how to create one here) or a Shopify development store.
- A Sanity account (you can create one here)
In addition to these requirements, we recommend understanding the basics of React, Sanity, Remix and Hydrogen to get the most out of Fluid.
Create a new Fluid project
-
Initialize a new Fluid project using the following command in your terminal:
Terminal window npm create fluid@latestTerminal window pnpm create fluid@latestTerminal window yarn create fluid -
Now that your project has been created, you can
cdinto your new project directory. -
Install dependencies
If you skipped the Install dependencies? step during the CLI wizard, then be sure to install your dependencies before continuing.
Terminal window npm installTerminal window pnpm installTerminal window yarn install -
Initialize or link an existing Hydrogen storefront
If you skipped the Initialize or link an existing Hydrogen storefront? step during the CLI wizard, then be sure to initialize or link an existing Hydrogen storefront:
If you have a paid Shopify plan, it’s recommended to install and setup the Hydrogen channel.
The Hydrogen channel is available for all Shopify plans (Basic, Shopify, Advanced, or Plus plan) and will allow you to deploy your wesbite on Oxygen (Shopify’s global hosting solution). Once you install the Hydrogen channel you’ll need to create a new storefront. We invite you to follow the official Shopify’s instructions to get started.
To link your Hydrogen storefront to your project, run the following command:
Terminal window npx shopify@latest hydrogen linkTo pull the environment variables from the Hydrogen storefront, run the following command:
Terminal window npx shopify@latest hydrogen env pullThe Headless channel is the right choice if you don’t have a paid Shopify plan. It will give you the exact same experience as the Hydrogen channel, except you won’t be able to deploy your website on Oxygen. You can install the Headless channel here and create a new storefront.
Once you’ve installed the channel, you’ll need to update the
.envfile with your access tokens. You can safely duplicate the.env.templatefile and name it.env.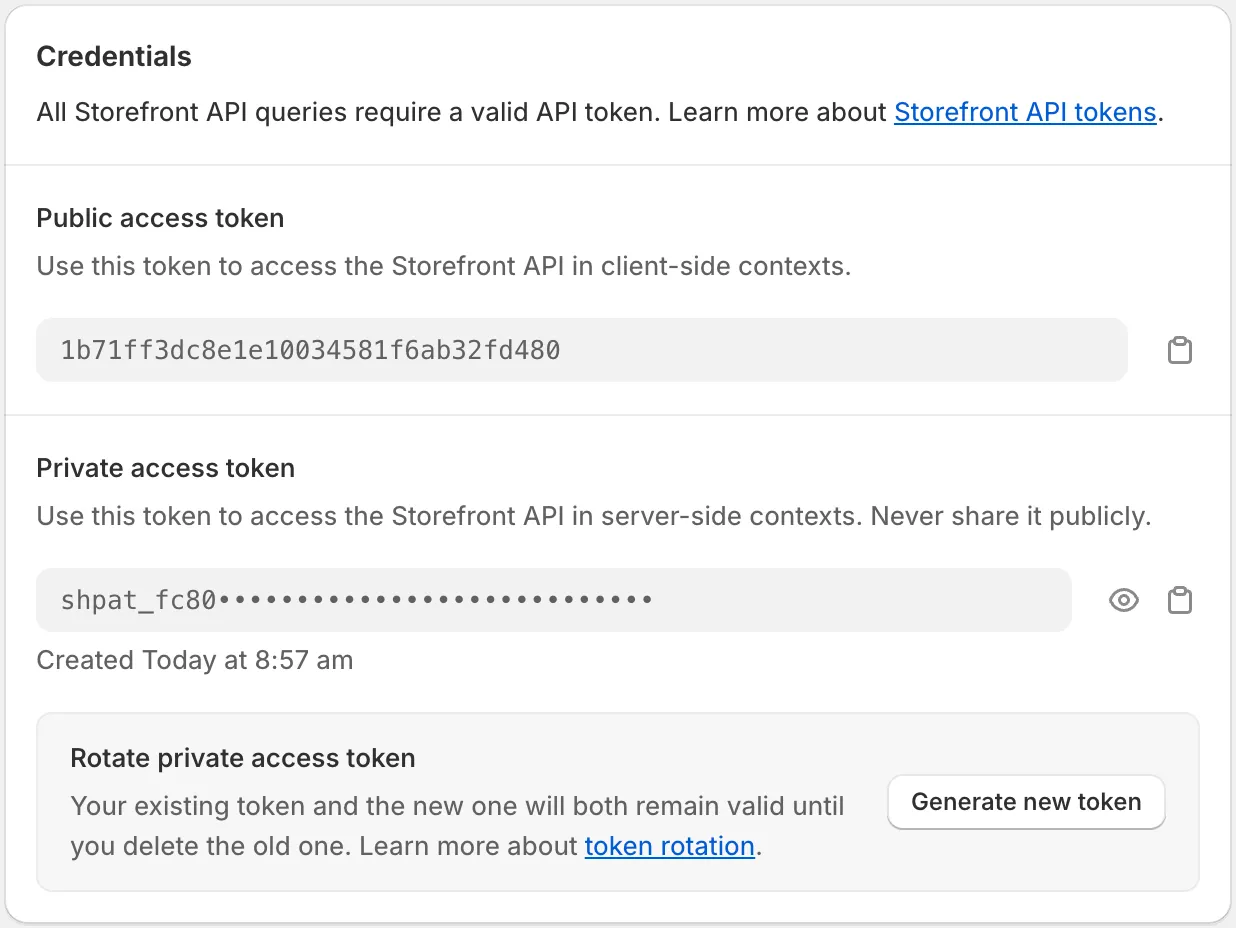
The Public access token will be your
PUBLIC_STOREFRONT_API_TOKENand the Private access token will be yourPRIVATE_STOREFRONT_API_TOKEN.You can also replace the
PUBLIC_STORE_DOMAINwith your store’s domain (xxx.myshopify.com). You can find your store’s domain in the Shopify admin dashboard > Settings > Domains. -
Initialize or link an existing Sanity project
If you skipped the Initialize or link an existing Sanity project? step during the CLI wizard, then be sure to initialize or link an existing Sanity project:
Terminal window npx sanity@latest init --env .env.sanityThis command will create or link an existing Sanity project and generate a
.env.sanityfile in your project directory with yourPUBLIC_SANITY_STUDIO_PROJECT_IDandPUBLIC_SANITY_STUDIO_DATASET. You can use these variables in your.envfile. More details about environment variables can be found here.If needed, run the following command to login to your Sanity account:
Terminal window npx -y sanity@latest login -
Update Sanity CORS
If you skipped the Initialize or link an existing Sanity project? step during the CLI wizard, run the following command to update Sanity CORS:
Terminal window npm run create:corsThe
create:corsscript will automatically add the hosts to the Sanity CORS settings.You can also go to your Sanity admin dashboard
npx sanity@latest manageand manually add every hosts that we’ll need to connect to the Sanity project API. We suggest to addhttp://localhost:*and any production domain that you want to use. Use can use the wildcard*to allow multiple domains.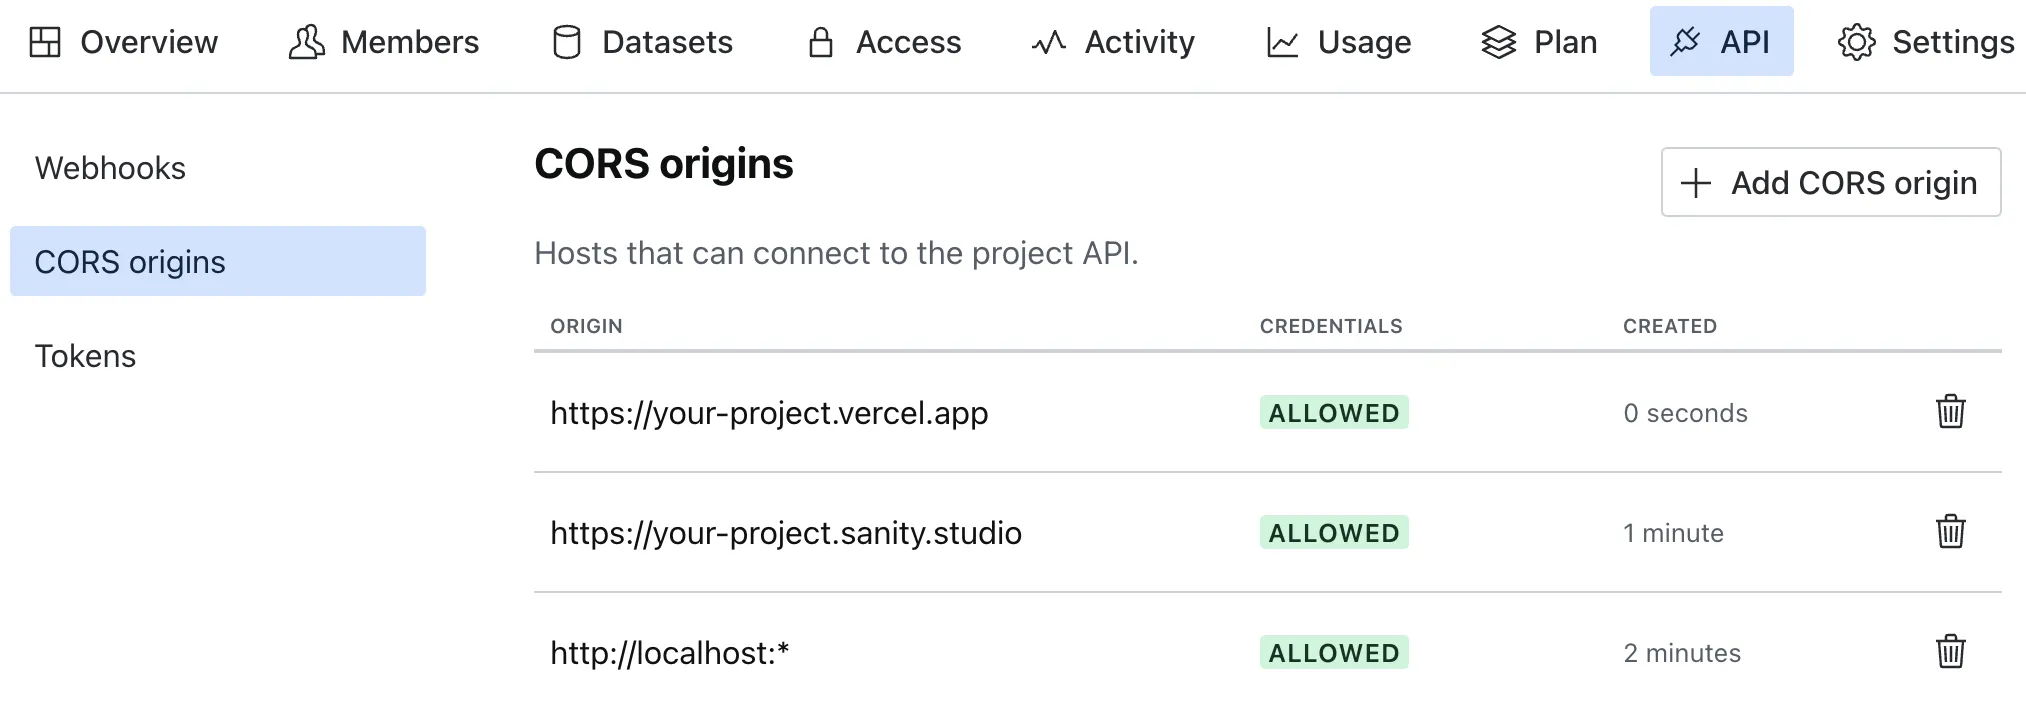
-
Create a Sanity viewer token
If you skipped the Initialize or link an existing Sanity project? step during the CLI wizard, run the following command to create a Sanity viewer token:
Terminal window npm run create:tokenThe
create:tokenscript will automatically create a Sanity viewer token and add it to your.envfile.You can also create a viewer token manually in your Sanity admin dashboard
npx sanity@latest manage, and add it to your.envfile. -
Install the Sanity Connect app
To automatically synchronize your Shopify products and collections with your Sanity project, add the Sanity Connect app in your Shopify store. Select the Sanity project you created and the dataset.
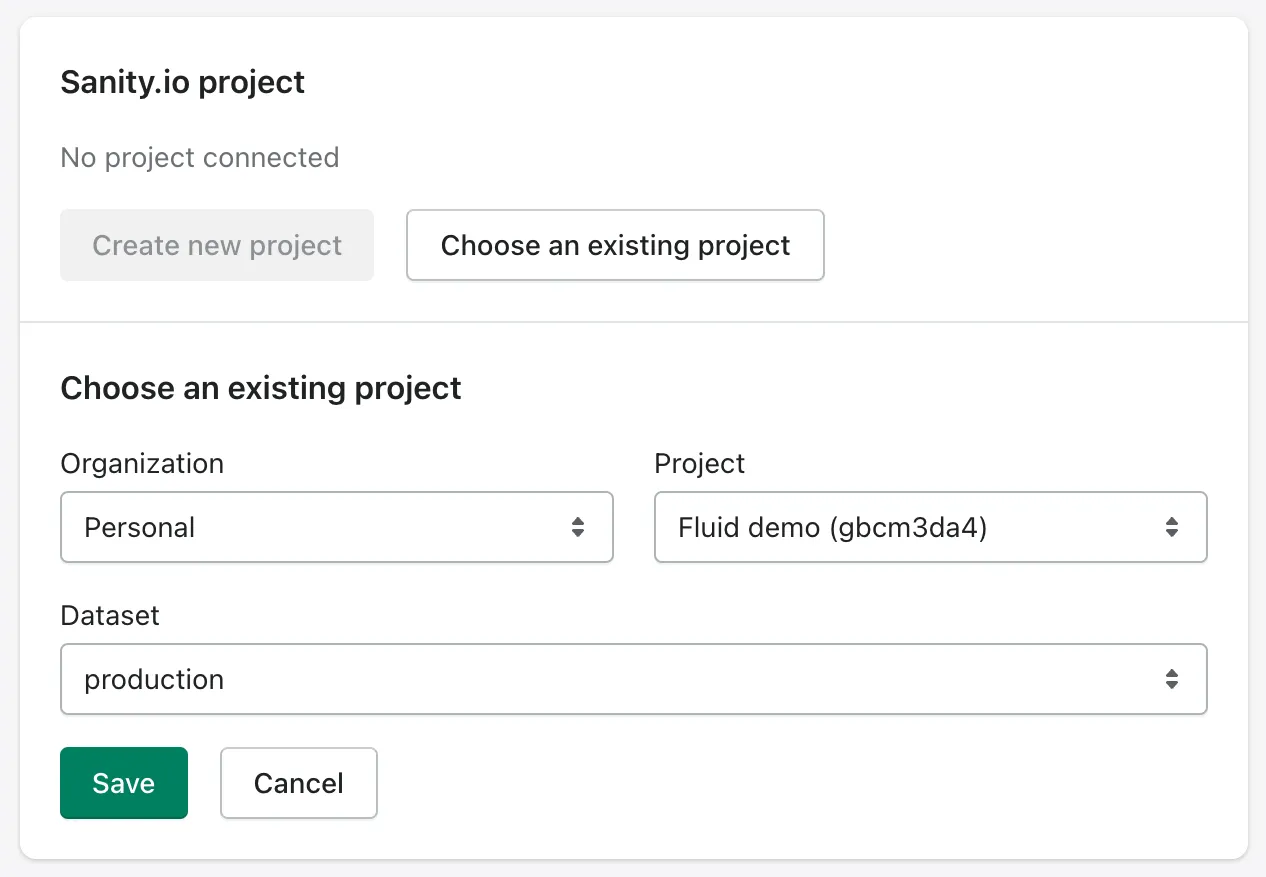
Leave the default settings and start synchronizing:
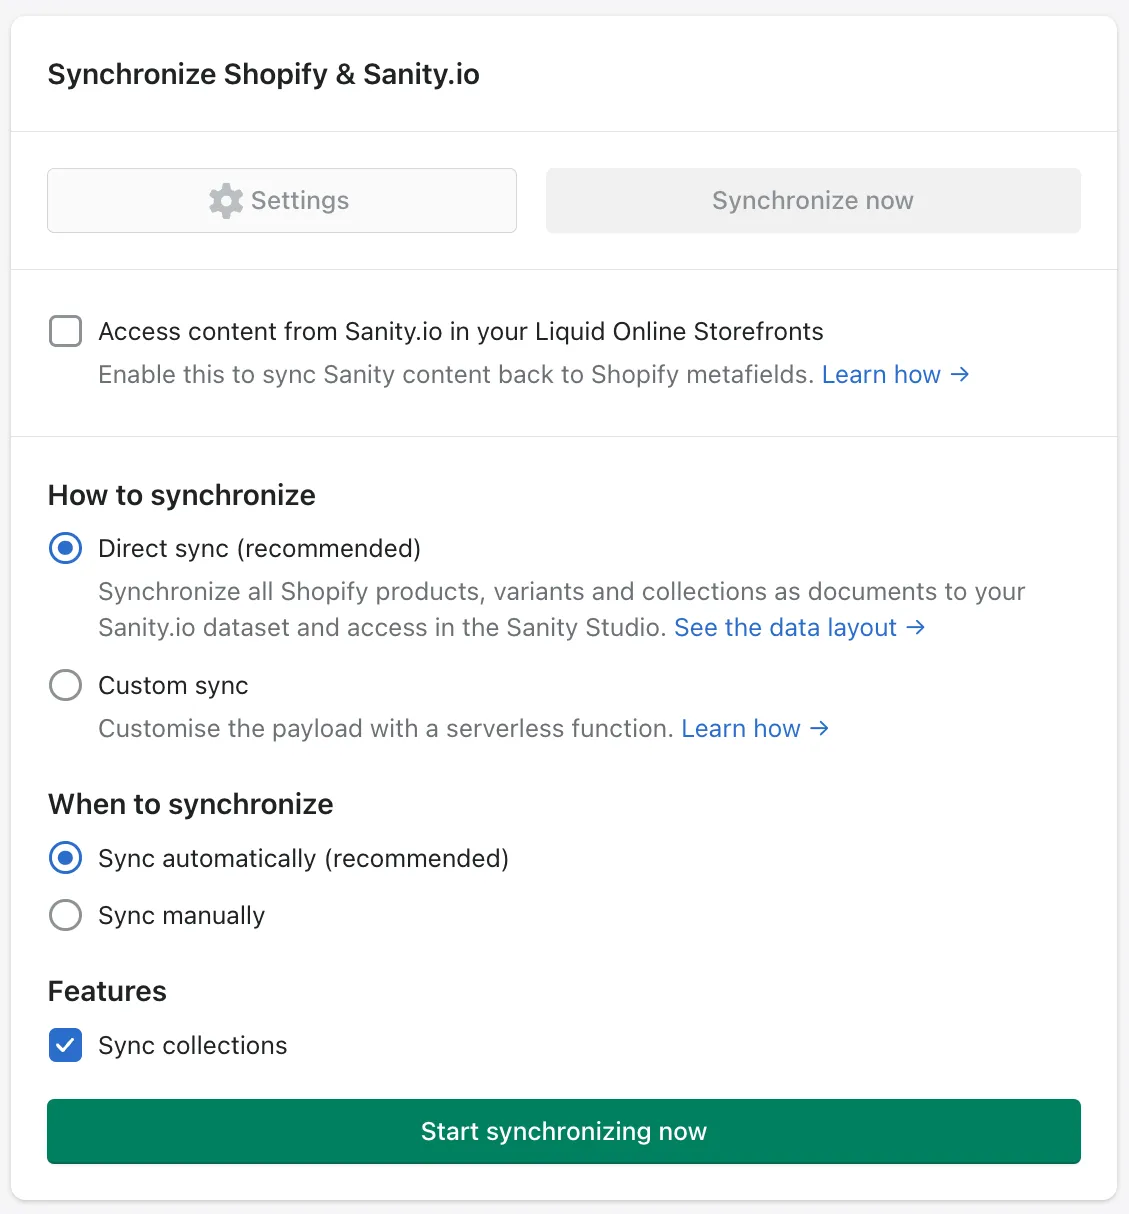
Now, each time you add or update a Shopify product or collection, your Sanity project will be automatically updated!
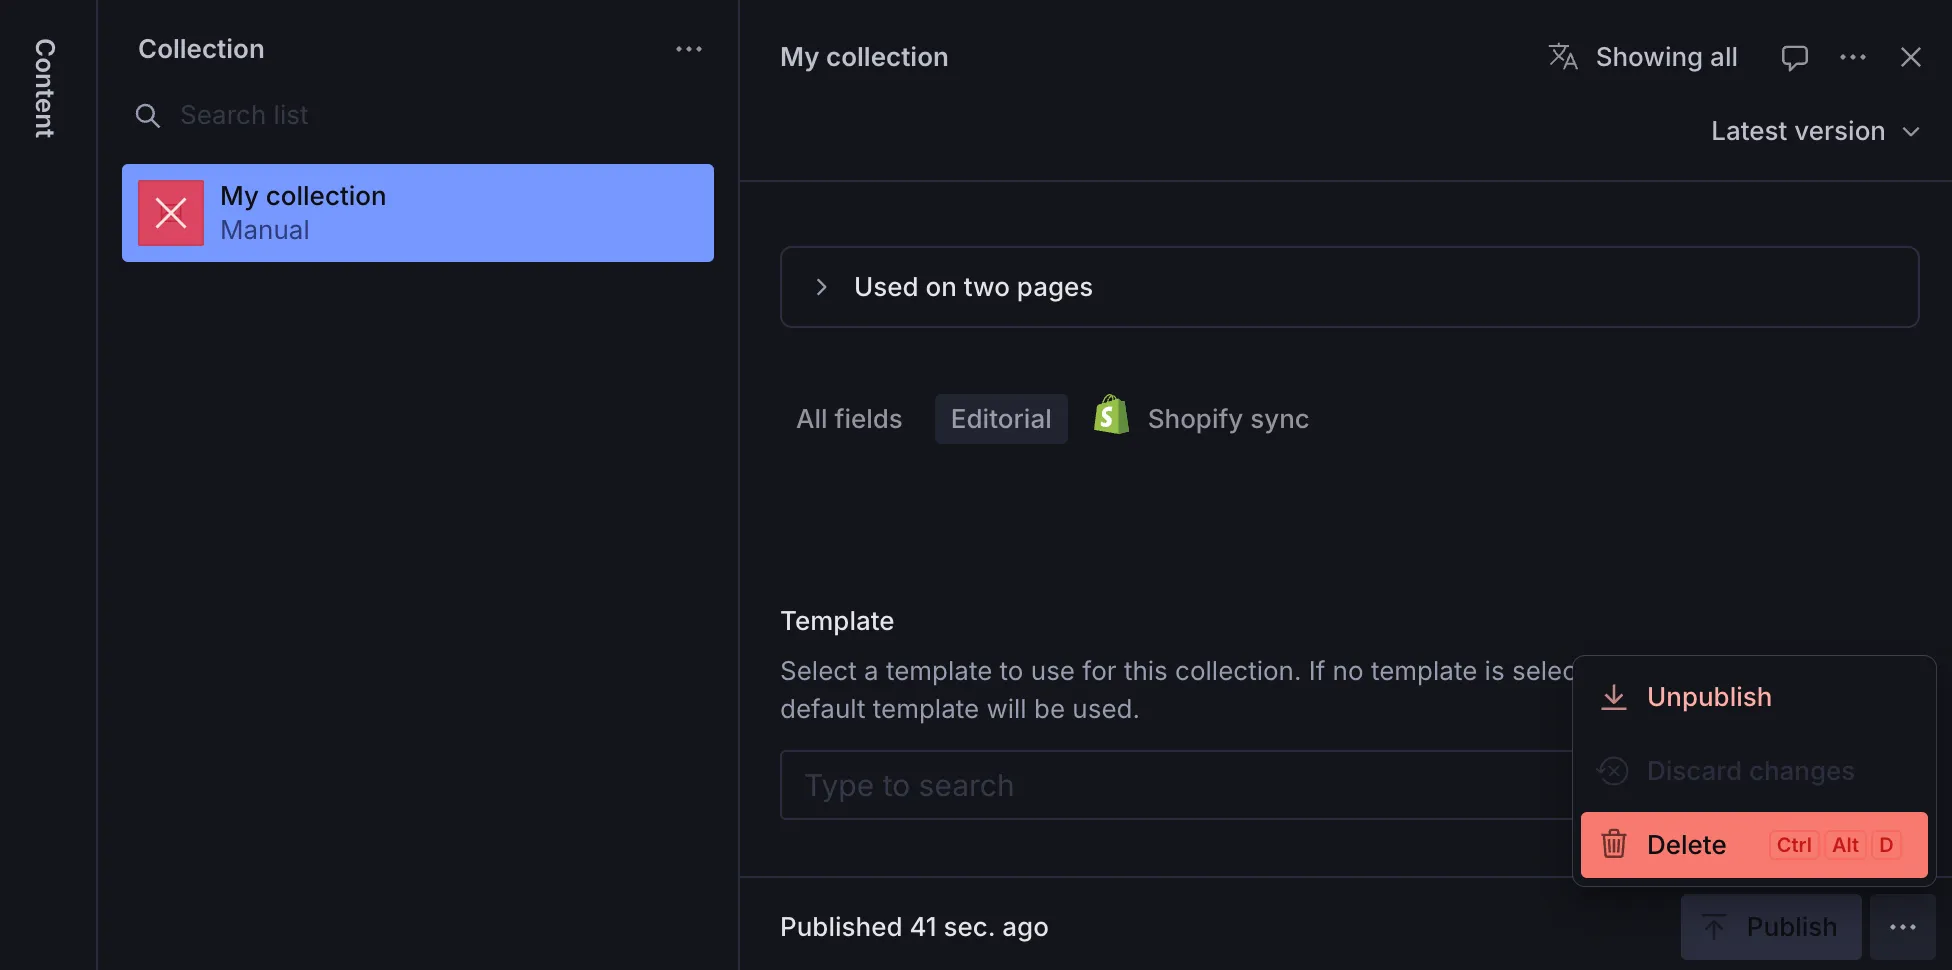
Please note that the Sanity connect app won’t automatically delete products or collections that are no longer in your Shopify store. If you you to completely delete a product or a collection from your Sanity project, you’ll have to do it manually:
-
Create initial Sanity data
To create the initial Sanity data, run the following command in your terminal:
Terminal window npm run create:initialTerminal window pnpm run create:initialTerminal window yarn run create:initialThis command will run the
create:initialscript that will create the initial Sanity documents and singletons. -
Launch your app
To launch your app, run the following command in your terminal:
Terminal window npm run devTerminal window pnpm run devTerminal window yarn run devThis command will start the Hydrogen app in development mode.
Environment variables
Fluid requires the following environment variables to function properly. Some will be used by the Hydrogen app to connect to your Shopify store, and some will be used by the Sanity Studio.
# ShopifySESSION_SECRET="topSecret"PUBLIC_STORE_DOMAIN="fluid-demo.myshopify.com"PUBLIC_STOREFRONT_API_TOKEN="046fc93a591ca78ec9dc34657b660ac6"PRIVATE_STOREFRONT_API_TOKEN="shpat_•••••••••••••••••••••••••"PUBLIC_CUSTOMER_ACCOUNT_API_CLIENT_ID="shp_•••••••••••••••••••••••••"PUBLIC_CUSTOMER_ACCOUNT_API_URL="https://shopify.com/•••••••••••••••"PUBLIC_STOREFRONT_ID="22227"PUBLIC_STOREFRONT_API_VERSION="2024-01"PUBLIC_CHECKOUT_DOMAIN="checkout.frontvibe.com"SHOP_ID="68877353204"# SanityPUBLIC_SANITY_STUDIO_PROJECT_ID="gbcm3da4"PUBLIC_SANITY_STUDIO_DATASET="production"SANITY_STUDIO_USE_PREVIEW_MODE="true"SANITY_STUDIO_TOKEN="•••••••••••••••••••••••••"SESSION_SECRET
The SESSION_SECRET variable will be used to sign cookies.
You should create a unique secret and add it to your .env file.
It can be any random string that you can generate by yourself.
More info about signing cookies in Remix can be found here.
PUBLIC_STORE_DOMAIN
The PUBLIC_STORE_DOMAIN variable will be used to connect to your Shopify store.
You can find your store’s domain in the Shopify admin dashboard > Settings > Domains (xxx.myshopify.com).
PUBLIC_STOREFRONT_API_TOKEN
The PUBLIC_STOREFRONT_API_TOKEN variable will be used to connect to your Shopify store.
You can find it in your Hydrogen or Headless channel.
PRIVATE_STOREFRONT_API_TOKEN
The PRIVATE_STOREFRONT_API_TOKEN variable will be used to connect to your Shopify store.
You can find it in your Hydrogen or Headless channel.
PUBLIC_CHECKOUT_DOMAIN
The production shop checkout domain url.
PUBLIC_STOREFRONT_ID
The PUBLIC_STOREFRONT_ID can be found in the Shopify url of your storefront. If you installed the Hydrogen channel it can be found at https://admin.shopify.com/store/STORE_NAME/hydrogen/YOUR_ID.
If you installed the Headless channel it can be found at https://admin.shopify.com/store/STORE_NAME/headless_storefronts/YOUR_ID.
PUBLIC_CUSTOMER_ACCOUNT_API_CLIENT_ID
A token prefixed with shp_ that represents a client secret used in all authentication requests.
The PUBLIC_CUSTOMER_ACCOUNT_API_CLIENT_ID can be found in Customer Account API settings page > Customer Account API Credentials
PUBLIC_CUSTOMER_ACCOUNT_API_URL
The target URI origin of authentication requests. For example: https://shopify.com/<your-shopify-store-id>.
The PUBLIC_CUSTOMER_ACCOUNT_API_URL can be found in Customer Account API settings page > Application endpoints The URI is the common base URL of all the endpoints listed in the card.
SHOP_ID
The SHOP_ID can be found at https://admin.shopify.com/store/STORE_NAME/shop.json.
PUBLIC_SANITY_STUDIO_PROJECT_ID
The PUBLIC_SANITY_STUDIO_PROJECT_ID variable will be used to connect to your Sanity project.
You can find it in your Sanity project admin dashboard or in your .env.sanity file.
PUBLIC_SANITY_STUDIO_DATASET
The PUBLIC_SANITY_STUDIO_DATASET variable will be used to connect to your Sanity project.
You can find it in your Sanity project admin dashboard or in your .env.sanity file.
SANITY_STUDIO_USE_PREVIEW_MODE
Used by the Hydrogen app to enable/disable Sanity Preview Mode.
Your visitors won’t see these encodings, but the Overlays will see them and overlay the editing UI on hover.
More info about Sanity Loaders and Overlays.
SANITY_STUDIO_TOKEN
A viewer token is required for server-side fetching of draft content as well as “stega encoding” for Visual Editing.
Countries, Currencies and Internationalization
Update the countries/index.ts file to add or update countries, currencies and languages.
The default country will be used as a fallback when no country is found in the url.
This file is shared across your Hydrogen app and Sanity studio.
export const countries: Localizations = {default: { country: 'US', currency: 'USD', isoCode: 'en-us', label: 'United States (USD $)', language: 'EN', languageLabel: 'English',},'/fr': { country: 'FR', currency: 'EUR', isoCode: 'fr-fr', label: 'France (EUR €)', language: 'FR', languageLabel: 'French',}};Under the hood, Fluid fetches countries, currencies and languages from Shopify. You can manage your Markets from the Shopify admin to add new currencies for example, learn more about Shopify Markets. Every content from Shopify is translatable from the Shopify admin. You can install and use Shopify’s free and official Translate and Adapt app.
Customer Account settings
Update the application setup
For the Customer Account API to recognize your domain as a valid authentication host, edit your Customer Account API settings.
Under Application setup, click Edit ✎ to edit the endpoints. Under Callback URI(s), click Add Callback URI, and add your production domain, with /account/authorize appended:
https://<your-production-domain>/account/authorizeThis is the URI your application will redirect to to continue the OAuth process after a successful customer login.
Under JavaScript origin(s), click Add origin, and then add your production domain.
Under Logout URI, click Add Logout URI, and then add your production domain.
Please read the official Shopify guide for more information.
Troubleshooting
Sanity login error
Error: --with-user-token specified, but no auth token could be found. Run `sanity login`Run npx -y sanity@latest login to login to your Sanity account.